


QUALITY SOUND - UNRIVALED COMFORT
FUNCTIONAL DESIGN
QUALITY SOUND - UNRIVALED COMFORT
FUNCTIONAL DESIGN
QUALITY SOUND - UNRIVALED COMFORT
FUNCTIONAL DESIGN
QUALITY SOUND - UNRIVALED COMFORT
FUNCTIONAL DESIGN
QUALITY SOUND - UNRIVALED COMFORT
FUNCTIONAL DESIGN
QUALITY SOUND - UNRIVALED COMFORT
FUNCTIONAL DESIGN
QUALITY SOUND - UNRIVALED COMFORT
FUNCTIONAL DESIGN
awesome
EARBUDS
INSTRUCTIONS
While we build our new website, please check out the
AWESOME EARBUDS, EARPHONES, ACCESSORIES
CUSTOM-MOLDED EARBUDS
WIRELESS EARPHONES AND
AWESOME ACCESSORIES
Instructions
CUSTOM-MOLDED EARBUDS
step 1 - WHAT YOU WILL NEED
A) Two-part AWESOME EARBUDS silicone mold material
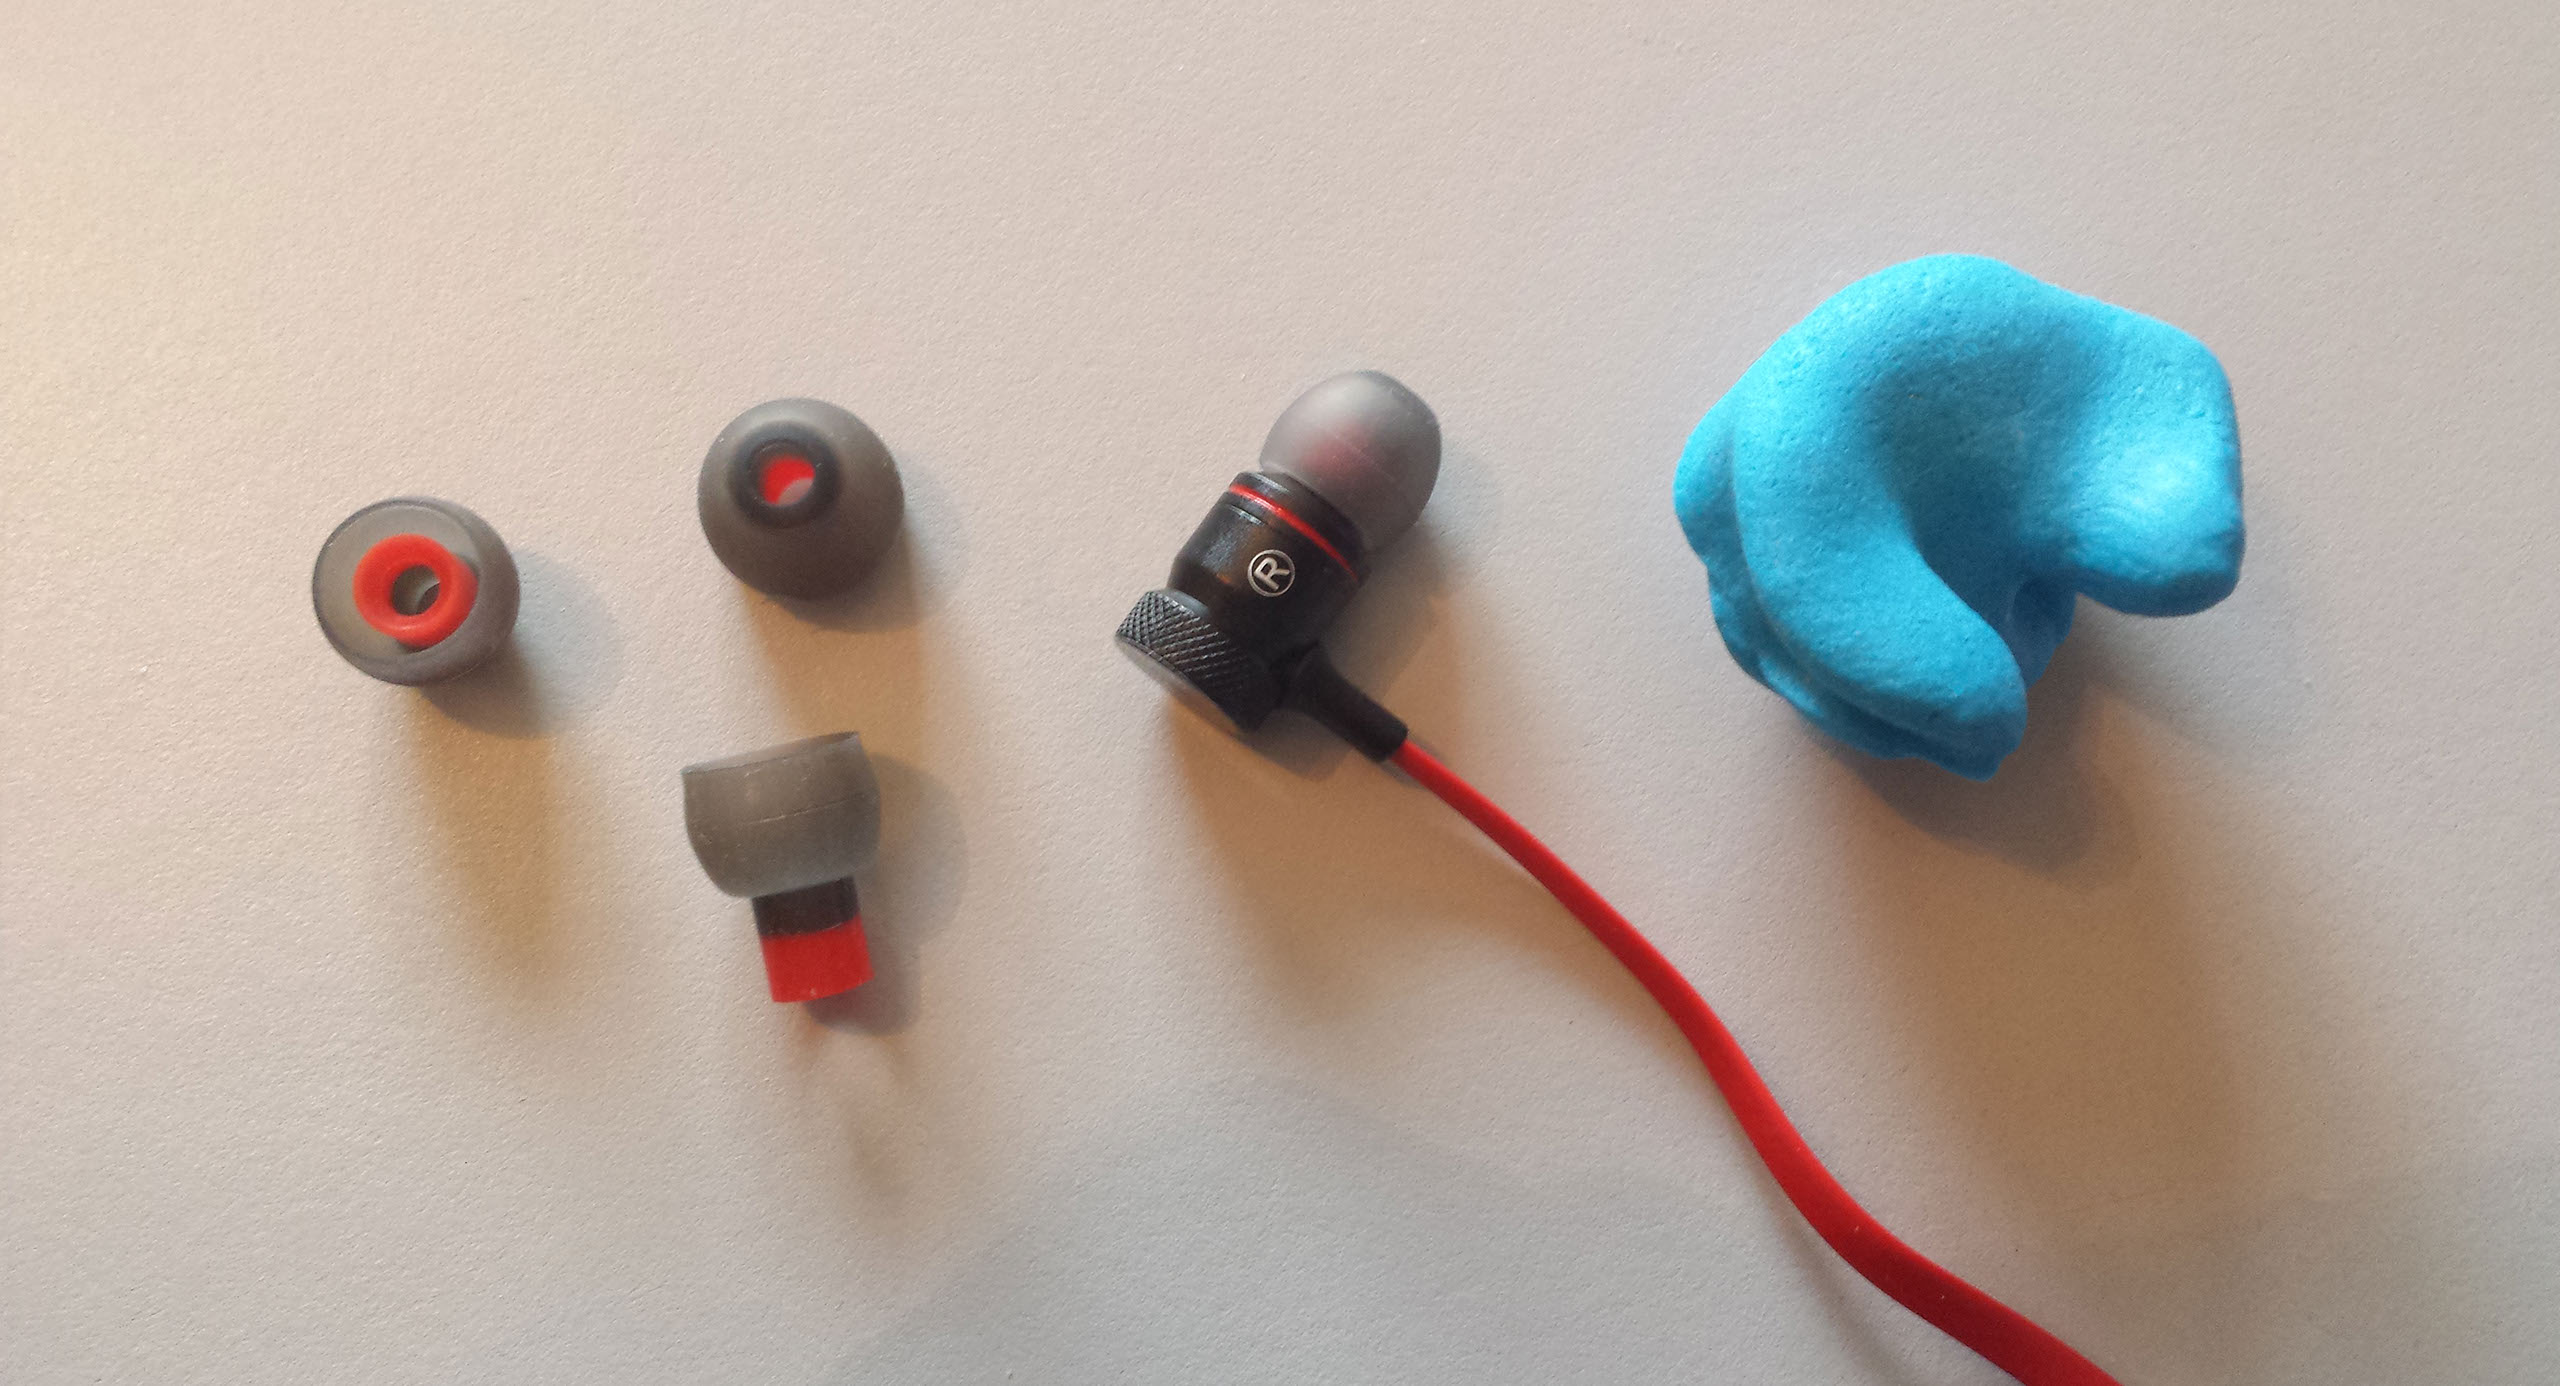
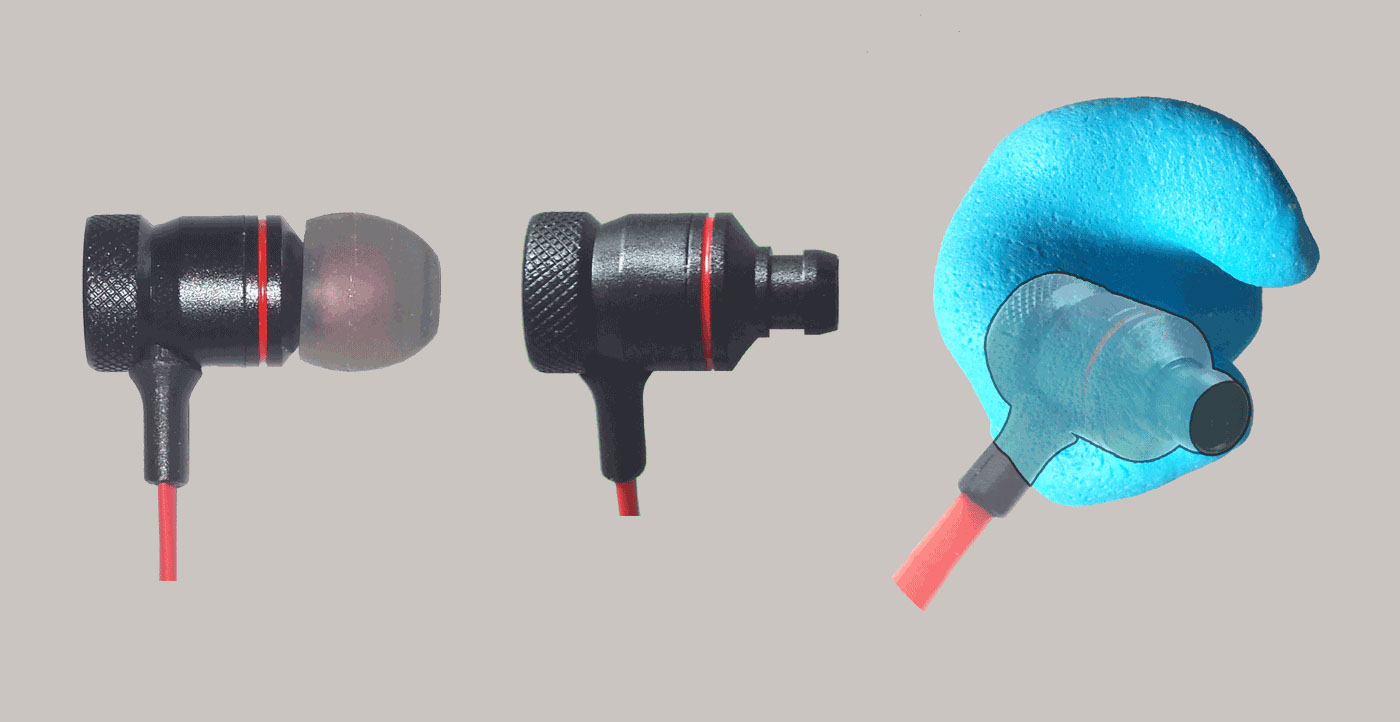
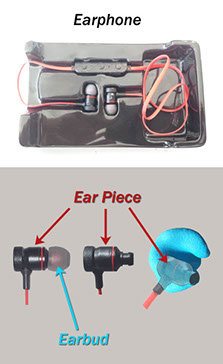
B) Single or dual earphone set with removable earbud pieces
C) Sharp blade for trimming the cured silicone earbuds
D) Rag or paper towel
E) Clean work surface and ears
Please read all instructions first
The process includes:
A) Test-fit earphones without earbud pieces, so you know how they feel.
B) Mix 1/4 of the 2-part silicone putty.
C) Wrap mixture around tip of earphone.
D) Press earphone and putty mix into your ear and check mirror for position.
E) Quickly mix another 1/4 of the 2-part silicone putty and fill the ear
F) Sit quietly, without talking for 10 minutes.
G) Repeat for second ear.
H) Trim excess silicone material and enjoy!
If you purchased an earphone set from us, it came with standard, removable earbud pieces. Once removed, you may want to store them. But, after you use your new custom-molded set, we are confident you'll never want to use anything else. You can use your own earphones, as long as the earbud rubber / foam parts are removable. If possible, work in front of a mirror.
Prepare your work area. Work in a clean, dry, dirt-free space. Any dust or dirt incorporated when mixing the two-part silicone putty together will become permanently embedded. So, a good wipe-down of the work area with a damp rag or paper towel is recommended. Make sure the surface is dry after cleaning.
Clean and dry your ears and trim ear hair. If you don't trim those ear hairs now, you will be administering the equivalent of a Brazilian wax job.
step 2 - practice positioning
Before taking the earbud pieces off the earphone, fit the earphones into your ears and notice how deeply they go into your ear canal. Notice their position and angle in the mirror. Now, remove all of the foam and / or rubber earbud bits from the ear pieces.
With all of the rubber and foam pieces removed from your earphone, it will fit into your ear canal differently, as in deeper, because the original earbud pieces are now gone. Put the earphone into your ear so you can feel what it's like without the ear pieces. Notice the position in the mirror. In most adults, the ear canal points forward and slightly upward.
step 3 - prepare the silicone
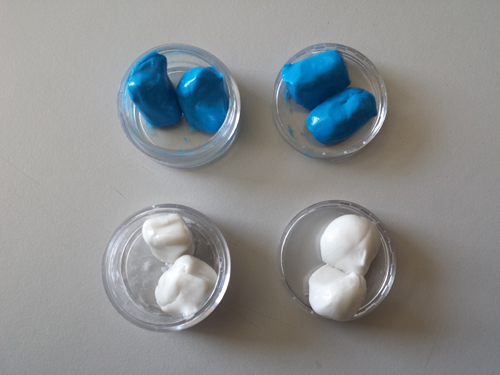
There are two parts to the silicone mold material; the color component (part 1) and the activator component (white part 2). Note that you want to keep them completely separate until you are ready to mix them in STEP 5. Also note the residual on your hands (and possibly under fingernails) and on the blade used for dividing the pieces up. Use a rag to wipe your hands and blade thoroughly, when switching from working with each component during this process.
You can start with either part. Divide each component into 4 equal pieces. The easiest way to do this is to pull out the entire blob, roll it into a ball, then chop it in half with your blade. Then, roll each of the halves into a ball and cut each of them in half, yielding 4 parts of the colored component and 4 of the activator. Remember not to mix or cross-contaminate the parts yet.
step 4 - prepare to mix
DON'T MIX YET. Note that you will want to keep the tip of the earphone (where the sound comes out) as clear as possible during this process. The blade can be used for clearing and trimming later, but here's the best process.
Notes: It may seem like a lot of putty. That's okay. We want you to use it all. The cured silicone mold can be trimmed down later. You will be making two batches of putty for each ear. That's why the four pieces of each are required. The putty won't start to harden for a couple of minutes, so no need to rush, but work efficiently.
step 5 - mixing and molding
You will be taking 1/4 of the color (part 1) and 1/4 of the white (part 2) and kneading them together until there are no color streaks or swirls. The best way to do that is by repeating a combination of stretching, folding, and kneading.
Once thoroughly mixed, roll it into a snake approximately 2" (50mm) long. Wrap the snake around the tip of the earphone being careful not to force any putty into the audio opening.
Now, working quickly, mix another 1/4 of each component together. Use this mixture to fill in around the earphone and fill up the rest of the ear cavity. Press and smush it around and notice the position and angle of the earphone. It's okay to encapsulate the wire. You will want to avoid forcing putty into any other openings in the earphone.
step 6 - relax!
The AWESOME EARBUDS silicone molds will setup in about 5 minutes, but you don't want to take them out for 10 minutes, so that pulling them out doesn't change their shape. You will likely hear the crackling of the curing process. The silicone may feel warm, but never more than a few degrees above normal body temperature. Also, you should really relax..refrain from all activity, including talking, eating, or drinking. These activities cause the jaw to move, which in turn moves the ear canal, which could modify the shape of your custom-molded earbuds. For the best fit possible, relax!
Use your blade to clear any silicone putty from the tip.
step 7 - repeat for ear #2
Now that you know the process, the second ear goes much faster!
step 8 - cure and trim
Ideally, let them rest for 24 hours. That will allow them to cure and the shape will be set for many years of usage. If you want to start using your new AWESOME EARBUDS right away, feel free. But, please wait 24 hours before trimming. By trimming, we mean cutting into the meat of the silicone to reduce size and remove any odd protrusions or thin edges. Be careful not to remove material that is vital to the fit of your new earbuds.
Now you are ready to enjoy the perfect fit, comfort,
and totally unique look of your headphones.